Encounter at Banja
3/1/45
On new years day the IV SS Panzer Korps launched operation Konrad, an attack to relieve the surrounded Axis forces in Budapest. By the 3/1/45 Soviet resistance began to stiffen.
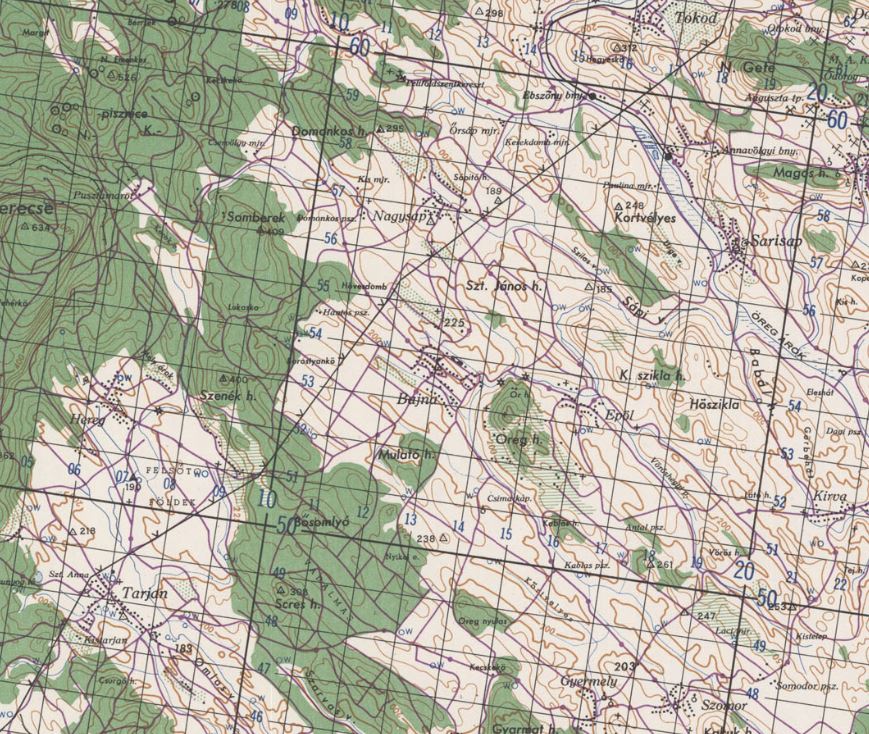
Contemporary Map of the Area
Map and Order of Battle
Battle Size
This scenario has two sizes big (8'x5') and small (6'x4')
PTOP 93RD, 170 Tank Brigade, I/6SS PzG, 5SS PzKG, I/9SS PzG and I/23SS PzG do not participate in the small scenario
Soviet Deployment
Soviets deploy first
The three PTOP (Anti tank strongpoints) of the 86th Guards are deployed in the area shown by the pink dashed lines. The top line is 6" from the north table edge. They start the game in entrenchments (2 left shift)
The 181st Tank Brigade is deployed within 6" of point D
110th Tank Brigade and 363 SU Battalion is deployed within 6" of point F' (this is 12" north down road FF' if playing the big game)
32 Motor Rifle Brigade and 292nd Mortar Battalion start within 6" of point F in the big game or enter the table turn 1 in the small game
One the PTOP of the 93rd Rifle Division starts within 6" of Hereg, but not within 9" of the table edge. the other PTOP starts within 6" or Tarjan. They start the game in entrenchments (2 left shift). These units are not included in the small scenario.
The 170 Tank Brigade with the 1438 SU Battalion enter within 6" of point A on turn 3. This unit is not included in the small scenario.
German Deployment
German units deploy second
German units shown on the north of the map enter the battle within 6" of points B or C. Units shown on the west of the map enter within 6" of point H. I/6SS Panzergrenadier enters within 6" of point A
II/6SS, III/6SS and III/5SS Panzergrenadier Bataillon all enter the battle turn 1
3SS Panzer Regiment and 3SS Panzerjäger enter turn 2
3SS Panzer Aufklarungs Abteilung and 5SS Panzer Kampfgruppe enters turn 3
I/6SS and II/9SS Panzergrenadier Bataillon enter on turn 4
I/23SS Panzergrenadier Bataillon enters on turn 5
Terrain
This scenario has two table sizes big (8'x5') and small (6'x4') if playing at 6" = 1km. North is towards the top of the map
The open ground is farm land, for the most part without significant field boundaries
The brown areas are level 2 hills
The dark green areas are managed woods. Note that all of the largest wood is on a level 2 hill
The light green areas are vineyards
The grey squares are open BUA
The red lines are roads, they have no game effect.
The blue line is a river, it is impassable
The brown dashed lines are level 2 ridgelines. Remember to use ridgelines or hills but not both.
|
Terrain |
Movement |
Cover |
ZOC |
Fire Power |
||||||
|
Leg/non-motorised |
Wheels/ motorised |
Tracked/ mechanised |
Inf & Cav |
Towed Guns |
Vehicle |
Inf & Cav |
Towed Guns & Vehicles |
IDF |
||
|
BUA Scattered |
- |
- |
- |
1L |
1L |
1L |
Cluttered |
- |
- |
- |
|
Hill |
* |
* |
* |
- |
- |
- |
Clear |
* |
* |
* |
|
Open |
- |
- |
- |
- |
- |
- |
Clear |
- |
- |
- |
|
Vineyards |
Pure |
Impassable |
- |
1L |
- |
- |
Clear |
- |
- |
- |
|
Woods Managed |
Difficult |
Difficult |
Difficult |
1L |
1L |
1L |
Cluttered |
- |
- |
Zero |
|
Terrain |
Movement |
Cover |
ZOC |
Firepower |
||
|
Leg/non-motorised |
Wheels/ motorised |
Tracked/ mechanised |
||||
|
Bridge & Defile |
Obstacle |
Obstacle |
Obstacle |
- |
- |
1R |
|
Ridgelines |
- |
- |
- |
- |
Cluttered |
- |
Aircraft
Both sides were active over the battlefield. Every daylight turn each side rolls 1d6. On a 5 they get a single aircraft and on a 6 they get two aircraft
The Soviets get Il-2m, the Axis Fw-190F, Me-210Ca or Hs-129. The Me-210Ca are Hungarian and the Fw-190F may be Hungarian or German. Randomise which aircraft the Axis get: 1 Hs-129, 2 Me-210Ca, 3-4 Hungarian Fw-190 and 5-6 German Fw-190. Randomise once for both aircraft.
Special Rules
The game is 10 turns long for the big game and 8 turns for the small game. The first two turns are in darkness
Victory Conditions
The Germans have three victory locations in the small game: X, E' & F'. they have four locations in the large game X, E, F & G
To win in the small game the Germans must capture at least 2 out of 3 objectives, in the large game they must capture at least 3 out of 4
For a draw in the small game they must capture E' or F', for a draw in the large game they must capture 2 of: E, F or G.
Any other result is a Soviet victory.
To capture the bridge X the Germans must have a unit touching it.
To capture the road exit points E, E', F', F' or G the Germans must have a unit touching the road that leads to the exit point within 6" of the exit point.
HQ and logistics units can not be used to capture objectives
References
For the most part the scenario is based on the account from The Sword Behind the Shield by Norbert Szamverber. Additional info on the German units was taken from Fire Brigades by Kemen Nevenking