Battleaxe Day 1
15/6/41
V1.5
On 28 May, Wavell gave his orders for Operation Battleaxe, an
operation in three stages; the Axis forces were to be defeated on the frontier
and the area of Halfaya, Sollum, Capuzzo and Sidi Aziez was to be secured. In
the second phase, XIII Corps was to secure the area around Tobruk and El Adem,
then the areas of Derna and Mechili were to be captured. The plan was based on
intelligence information, which incorrectly indicated that 2⁄3 of the German
tank strength was at Tobruk, which would put the British at a decisive material
advantage on the frontier. The attack was scheduled for 7 June but was pushed
back at the instance of General O'Moore Creagh, whose squadrons had not received
their tanks until 9 June. The new date was 15 June, giving Creagh five days for
additional training.
In the first stage, the British would advance in a three-prong assault to clear
the frontier region. Along the coast was Coast Force and inland was Escarpment
Force. The former was responsible for capturing Halfaya Pass, while the latter
was to capture the remainder of the frontier at Fort Capuzzo, Musaid and Sollum.
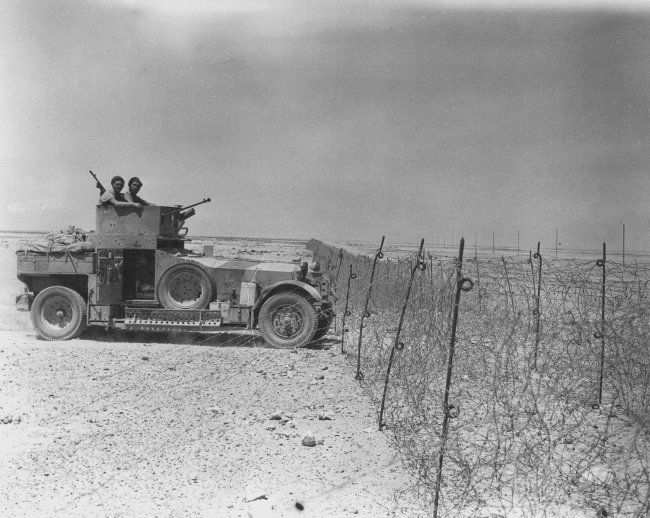
The 7th Armoured Brigade Group and the artillery of the Support Group, were to
engage and destroy the German tanks, which were thought to be at Hafid Ridge.
This would also trap Axis units on the frontier between themselves and the
remainder of the British forces. After capturing the frontier, the brigades of
the 7th Armoured Division would reform and continue north to relieve Tobruk.
Once joined by the Tobruk garrison, the combined forces would press on to the
west, driving the Germans as far back as possible
Though the previous Operation Brevity had failed to yield any territory to the
British, it showed Rommel that his front line defences were quite easy to
breach. Anticipating further British attacks, the Axis forces created a line of
fortified positions from Halfaya to Sidi Azeiz, placing a number of anti-tank
guns and anti-tank mines on the Halfaya Pass, Point 206 (south of Forth Capuzzo)
and on Point 208 (west of Fort Capuzzo on the Hafid Ridge). The primary
responsibility of the frontier defence was charged to the 15th Panzer Division,
which had received a new commander, General Walter Neumann-Silkow, on 8 June.
Poor signals security in the 7th Armoured Division, gave Rommel nine hours
notice of the operation. Rommel sent the 5th Light Division to the south of
Tobruk, ready to use it against either the Sollum area or on Tobruk.
Adapted from: https://en.wikipedia.org/wiki/Operation_Battleaxe
The scenario depicts the left flank and middle of the British attack against the German strong points
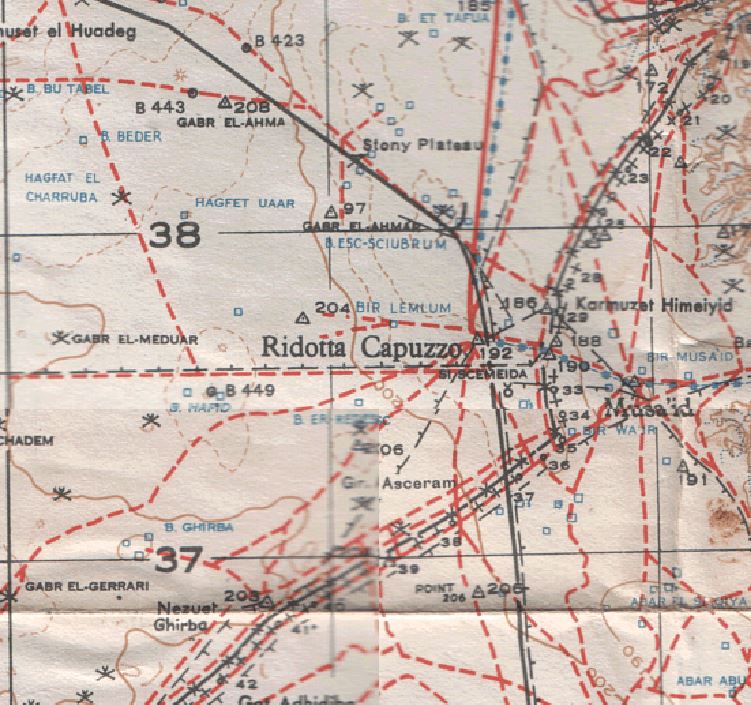
Map of the battle area from: http://www.veridical.co.za/Portals/13/BattleaxeMapOnly.jpg
Map and Order of Battle
Axis Deployment
Axis deploys first
Stützpunkt 206 must be deployed within 3" of point 206. It is entrenched (2 L)
I/33 Artillery Abteilung must be deployed within 9" of Pt 206. It is entrenched (2 L). It is in support of Stützpunkt 206 and 208.
Stützpunkt 208 must be deployed within 3" of Pt 208. It is entrenched (2 L)
Stützpunkt Capuzzo must be placed in Fort Capuzzo (Ridotta Capuzzo on the map above)
Stützpunkt Musaid must be placed in Musaid
Teil 15 Kradschützen enters turn 1 within 6" of point B
I/8 Panzer Regiment enters turn 5, along the north east edge within 18" of corner A
The Vorausabteilung enters turn 5 on the north west edge within 6" of corner A, or along the north east edge within 9" of corner A
II/8 Panzer Regiment, Stab 8 Panzer Regiment and the logistics enters turn 6, along the north east edge within 6" of corner A
I/5 Panzer Regiment, Stab 5 Panzer Regiment and the logistics enters turn 7 on the north west edge within 6" of corner A, , or along the north east edge within 6" of corner A
British Deployment
No British unit starts on the table
2nd RTR enters the table turn 1 on the south west table edge, up to 12" north west of point D
A Squadron 11th Hussars enters the table turn 1 on the south west table edge between points D and E
4th RTR enters the table turn 1 between points C and D
7th RTR enters the table turn 2 between points C and D
4th Armoured Brigade HQ and brigade logistics enters the table turn 3 between points C and D
6th RTR enters the table turn 3 on the south west table edge, up to 12" north west of point D
7th Armoured Brigade HQ and brigade logistics enters the table turn 4 on the south west table edge, up to 12" north west of point D
22nd Guards Brigade Group and A Squadron 3rd Hussars enters the table turn 4 between points C and D
All units of the 4th Indian Division have the option of delaying a turn and being entering the table up to 6" north west of point D (they cross the wire off map). Only one big based unit per turn may do this. As many small based units as required may do this. Units of the 22nd Guards Brigade may delay extra turns in order not to break the one unit per turn limit.
Terrain
The map is scaled at 6ft x 4ft, However the ground scale has been compressed roughly two times to fit the table size. Playing on an 8x5ft table would give a better representation of the ground scale. If doing so add two turns to the game length. Also there will be an extra 3 inch strip either end of the the 8ft x 5ft table not shown on the printed map (6x4ft actually proportionately scales up to 7.5ft x 5ft).
North is towards the top of the page.
The terrain is mostly empty desert
The black dotted line is "The Wire" an impassable barbed wire fence. It otherwise has no effect on play. The numbered white lines are gaps in the wire. They are treated as defiles.
(The wire is technically not impassable but both sides used the existing gaps rather than make new ones)
The grey square is Fort Capuzzo. See below for terrain effects
The yellow square is "Fort" Mussaid which is basically some high sand berms and a handful of scattered buildings. See below for terrain effects
The brown dotted lines are ridgelines
The red dotted line is a track, it has no game effect
|
Terrain |
Movement |
Cover |
ZOC |
Fire Power |
||||||
|
Leg/non-motorised |
Wheels/ motorised |
Tracked/ mechanised |
Inf & Cav |
Towed Guns |
Vehicle |
Inf & Cav |
Towed Guns & Vehicles |
IDF |
||
|
Fort Capuzzo & Mussaid |
Difficult |
Difficult |
Difficult |
2L |
- |
- |
Cluttered |
- |
- |
- |
|
Terrain |
Movement |
Cover |
ZOC |
Firepower |
||
|
Leg/non-motorised |
Wheels/ motorised |
Tracked/ mechanised |
||||
|
Defile (Wire gap) |
Difficult |
Difficult |
Difficult |
- |
- |
Half |
|
Ridgelines |
- |
- |
- |
- |
Cluttered |
- |
| The Wire | Impassable | Impassable | Impassable | - | - | - |
"The Wire"
Aircraft
The British had air superiority on the day though attacks over the immediate battlefield were limited. Starting British turn 5, and for every turn thereafter. they may roll for a P-40 Kittyhawk bomber. This arrives on a roll of 5-6
(This is a a way of abstracting the air attacks on reinforcements approaching the battlefield)
Special Rules
The game is 10 turns long. 12 if using an 8ft x 5ft table.
British move first
Victory Conditions
The objectives are: Point 208, Capuzzo and Musaid
To win the British must hold at least two objectives, one of which must be Capuzzo or Musaid and the other must be point 208
Its a draw if the British do not make the conditions for winning and hold either Capuzzo or Musaid.
If the British do not make the winning or drawing conditions it is an Axis victory
Holding means the British must have the only unit within 3" of the objective, and that unit must be in supply.
In supply means the logistics unit for the the occupying unit must be intact and there must be an path between the logistics and occupying unit that does not pass through an enemy ZOC.
References
2nd Scots Guards' War Diary: http://ww2talk.com/index.php?threads/war-diary-2nd-battalion-scots-guards-jan-dec-1941.57752/
3rd Hussars: http://ww2talk.com/index.php?threads/3rd-the-kings-own-hussars-ww2-unit-information.49934/
5 Leichte Division, http://www.feldgrau.net/forum/viewtopic.php?t=24891&start=15
11th Hussars' War Diary: http://www.warlinks.com/armour/11_hussars/11huss_41.php
61° Reggimento di Fanteria: http://www.regioesercito.it/reparti/fanteria/rgt/rgt61.htm
British Armies in WW2, Orders of Battle 1939 to 1941, David Ryan et al
The Crucible of War, Wavell's Command, Barrie Pitt
Report on Action of 257th Anti-Tank Battery (65th (NH) Anti-Tank Regiment, RA) at Capuzzo, 1517 June 1941, from WO 169/1173, http://forum.axishistory.com/viewtopic.php?f=56&t=200976&hilit=battleaxe
Tank Combat in North Africa, Thomas Jentz (this is the primary reference for the scenario)