
Escape from Hunt's Gap
1/3/43
v1.01
Operation Ochsenkopf (Oxhead) was a German plan to take the town of Beja in Tunisia. The plan stated well with with the defeat of the British at Sidi Nazir, however form then on things started to go badly for the Germans. To get to the Beja Plain from Sidi Nazir they had to pass through a valley the British named Hunt's Gap. This was blocked by the 2nd/4th Battalion the Hampshire regiment, not a particularly strong force with which to defend against a regimental strength panzer kampfgruppe. However the British had laid mines and had nearly three regiments of artillery behind the infantry. They also laid on copious air support. Added to this it rained a great deal and the valley floor turned to mud keeping the Panzers on the road and making them an ideal target for artillery and bombers. So progress was slow. However by 1/3/43 the Germans were on the verge of breaking through to British lines though both sides were now close to breaking point.
1943 Map of Hunts Gap: from http://www.bl.uk/onlinegallery/onlineex/maps/africa/4998570u18u1942.html
Map and Order of Battle
Deployment Order
British deploy the majority of their stands first. Then VA KG Lang is deployed and finally the British recce is deployed.
British Deployment
All British infantry and towed guns are dug in foxholes or sangars (+2 cover). Transport enclosed in square brackets starts "trucks to the rear".
D Coy 2/4 Hampshires are deployed in the area delineated by the pink dashed lines.
A Coy 2/5 Leicestershires are deployed within 6" of Montagne Farm or 6" of the un-named farm to it's north.
B Coy 2/5 Leicestershires are deployed within 6" of Ksar Mezouar
BHQ and the majority of the HQ company 2/4 Hampshires are deployed within 6" of Ksar Mezouar
The 2/4 Hampshires' recce stand and the carrier can be deployed within 12" of any of the above locations
There is a choice with deployment of A Squadron 46th Recce. It may be placed together on road EG. Alternatively individual stands may be placed anywhere on table as long as they are over 12" from any other stand and 12" from board edge AC.
A Squadron of the North Irish Horse must be deployed south of ridgeline FD
B Squadron of the North Irish Horse must be deployed on edge CD, but not within 18" of corner C.
The recce of North Irish Horse (NIH) may be placed anywhere on table as long as they are over 12" from any non-NIH stand and over 12" from board edge AC.
German Deployment
Vorause Abteilung KG Lang starts within 6" of Gare de Ksar Mezouar, but not within 12" of any British stands
I/86 Panzer Grenadier Bataillon enters the table turn 1 anywhere between points A & B
I/47 Infanterie Bataillon enters the table turn 1 anywhere between points B & C
The Panzergruppe enters the table along road B, in convoy, turn 1 (or later). Each vehicle after the first loses 3" for every vehicle that went before it this turn.
The Flakkampftruppe enters the table along road B, in convoy, turn 2 (or later). Each vehicle after the first loses 3" for every vehicle that went before it this turn.
Stab KG Lang and Stabs Kompanie enter the table turn 3 (or later) along road B.
Stab 47 Infanterie Regiment enters the table turn 4 (or later) along road B.
II/47 Infanterie Bataillon must roll to enter the table in each orders phase. It arrives on a 1 (d6). Historically the battalion got lost in the hills and did not make it to the battle
Terrain
The table is 5ft x 8ft if playing 1" = 50m
The open ground is soggy farmland bereft of cover. Wheeled vehicles are limited to a BMA when off road.
The brown area is fairly rocky and steeply sloped. It is prohibited to vehicles and man-handled guns. It is half speed for infantry
Grey areas are stone BUA giving +3 cover to infantry. Tanks and guns may be placed in the BUA, however they only get +1 cover (they are assumed to be between the buildings). The smaller squares only have space for one personnel stand within (no towed guns).
Solid red lines are tarmac roads. The dotted red lines are paths. The paths have no game effect.
The black dashed line is a railway, it has no game effect, except to negate terrain penalties
The green dotted lines are tree lines. They break LOS, unless a stand is against the tree line, and give +1 cover. Any stand on a tree lined railway is assumed to be adjacent to the tree lines on both sides.
The thin blue lines are streams. Infantry stands within, but not towed guns, get +2 cover. They are impassable to wheeled vehicles, tracked vehicles require a BMA to cross
The brown and sandy dashed lines are ridges. They break LOS if it passes across the line unless a stand is touching the line. Tanks get hull down cover (+2) if they are touching the line and fire crosses the line, and the firer is not also touching the line. The thick brown lines are higher than the others. Touching them allows the firer to see over the sandy coloured ridge lines and negates the sandy line's hull down bonus. Firers touching the dark brown ridges can also see over BUA, other stands and tree lines.
Black dotted lines are British minefields. There are gaps where the road passes at points H & J
Aircraft
Both sides were active in the air, though many of the attacks from both sides took place behind the front lines.
Each daylight turn roll 1d10 for both sides. Neither side can get more than three successful dice rolls during the game.
Axis: 1-8: no aircraft. 9: 1 MC.200 light attack, 10: 1 Ju-87D Stuka and 1 Bf-109G fighter
British: 1-7: no aircraft. 8: 1 Hurricane attack, 9-10 1 Hurricane attack and 1 Spitfire fighter
Special Rules
The game is 9 turns long with a 50% chance of a 10th turn (Roll at the end of turn 9) Turns 1-2 are night turns
Max visibility at night is 4". Spotting distances are halved or 4" whichever is smaller. The following night rules are in effect (pg 93): 39.1.2 (2nd paragraph only); 39.1.4 and 39.1.7
Max Visibility in the daytime is 24"
Victory Conditions
There are four victory locations: dark brown ridge KL, Ksar Mezouar, road BD and road BE
If the Germans hold 2 of the locations its a draw, if they hold 3+ its a German win. Otherwise its a British win
To hold a location the Germans must have the only stands in good morale touching it at the the end of the game.
Good morale means not demoralised and not shaken
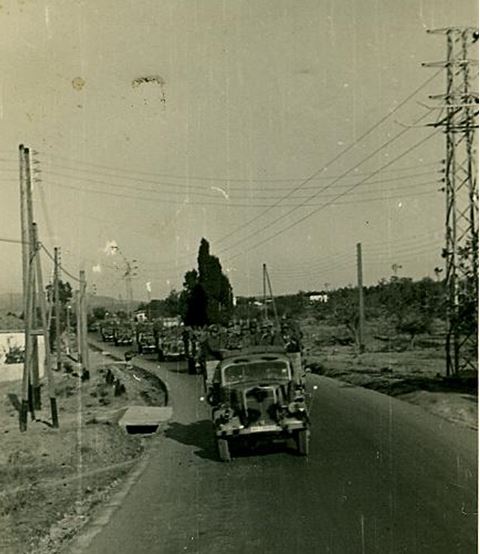
IR47 move up to the front. From: http://www.historic.de/Militar/22. ID/InfanterieRegiment47/IR47Bartels/Bartels1Griechenland/Opa mit Leutnant5.htm
References
46 Division Artillery: http://16dli.awardspace.com/page208.html
British Armies in WW2 and Organisational History, Vol 3 - David Hughes et al
The British Reconnaissance Corps in WW2: https://books.google.co.uk/books?id=xnIarNrEH_8C&lpg=PA12&ots=RFBVVz_LIv&dq=Ochsenkopf%201943&pg=PA13#v=onepage&q=Ochsenkopf%201943&f=false
Infanterie Regiment 47 Commanders: http://www.historic.de/Militar/22. ID/InfanterieRegiment47/IR47Main.htm
Kampfgruppe Lang: http://dak.webseiten.cc/einheiten/kampfgruppen/kampfgruppe-lang/
Kampfgruppe Lang in Tunisia - Attack on Beja: http://www.lonesentry.com/blog/battles-of-kampfgruppe-lang-in-tunisia-attack-on-beja.html
Major Cripps at Montaigne Farm: http://www.royalleicestershireregiment.org.uk/_ui/citations/55%20Cripps%20DSO%20citation%2022%20Apr%2043%201of2.pdf
North Irish Horse: http://northirishhorse.net/wwII/BattleReports/2.html, http://www.northirishhorse.net/articles/19.html , http://northirishhorse.net/wwII/diary/1943-2.html
Panzer Archiv Forum: http://forum.panzer-archiv.de/viewtopic.php?t=4654
Royal Hampshire Regiment: http://en.wikipedia.org/wiki/Royal_Hampshire_Regiment#World_War_II
Sidi Nsir and Hunt's Gap: http://www.lonesentry.com/blog/sidi-nsir-and-hunts-gap.html