Medjez el Bab
19/11/42 - 20/11/42
v1.4
The battle at Medjez el Bab was one of the first clashes between the Axis and Allies in Tunisia. Up to the 19th of November there had been no hostilities between the French forces that occupied Tunisia and the Axis. However German recce planes noted that the French in Medjez had been reinforced by the advancing allies. Once a deadline for the French to lay down their arms had passed it was only a mater of time until hostilities commenced.
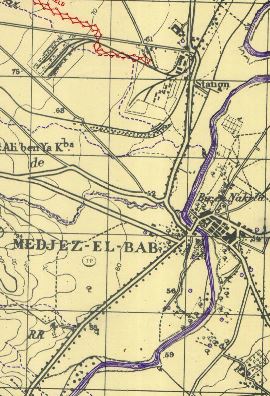
1943 Map of Medjez el Bab (from British Library Collection: http://www.bl.uk/onlinegallery/onlineex/maps/africa/5001183u27u1u1943.html )
Map and Order of Battle
Allied Deployment
The majority of French forces can deploy in, or within 6", of any BUA in Medej el Bab. Up to two stands can be deployed touching road CF
7e Escadron de Chars is a reinforcement. It will enter the table down road D or E at the start of turn 3 (lay orders and of turn 2)
The British parachute stand must be deployed touching the bridge in Medjez
The Derbyshire Yeomanry must be deployed west of line CF
B Battery 175th Field artillery Battery enters the battle turn one along road D
Axis Deployment
The III Btl 5 FJR is deployed on table within 12" of edge AB (note that the French had orders not to fire on the Germans unless fired upon)
XXXI Guastatori enter down road B on Turn 5
Terrain
The table is 6ft x 4ft if playing 1" = 50m
The open ground is open fields. There are patches of scrub scattered around, usually running along field boundaries. This does not break LOS but gives concealment and +1 cover to those infantry stands and class I guns within. Patches should only be big enough to conceal a single stand. there should be approx 6" between patches.
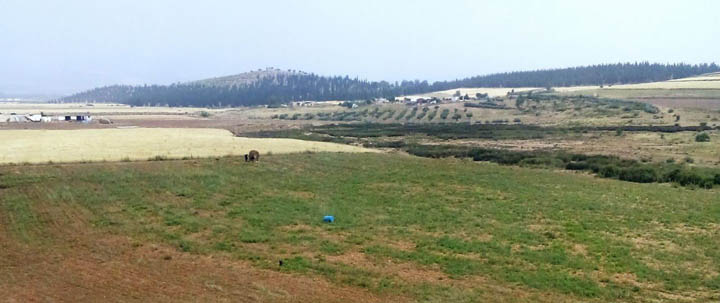
Farmland near Medjez El Bab (modern picture) - from Google Maps
The green areas are olive groves. They are treated as open woods
Grey areas are stone BUA giving +3 cover. Those in Medjez El Bab may not be entered by towed guns and vehicles. The Gare is more open so tanks and guns may be placed in the BUA, however they only get +1 cover (they are assumed to be between the buildings). The smaller squares only have space for one stand within.
Red lines are roads
The black dashed line is a railway, it has no game effect
The green dotted lines are tree lines. They break LOS, unless a stand is against the tree line, and give +1 cover. Any stand on a tree lined road is assumed to be adjacent to the tree lines on both sides.
The sandy dashed lines are ridgelines. They break LOS if it passes across the line unless a stand is touching the line. Tanks get hull down cover (+2) if they are touching the line and fire crosses the line, and the firer is not also touching the line.
The thicker blue line is a river in a gully. Its banks are only passable to infantry and cavalry (not man handled towed guns). It takes a BMA to enter the river and cross to the other bank and a BMA to exit. Stands in the middle of the river cannot be shot by stands out of the river unless either the shooter or the target are touching the bank. Stands on the river bank get +2 cover from stands outside the river if the firing stands are not touching the bank. Stands in the river may move at half speed down either bank built may not move down the middle of the river.
The bridge in Medjez el Bab is stone however it has a low parapet so provides no cover
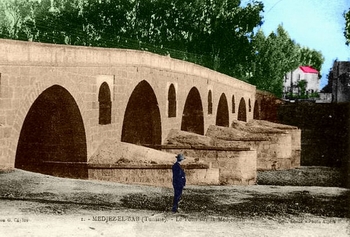
The bridge from: http://medjezelbab.voila.net/cartes/cartes.htm
The thin blue lines are streams, little more than ditches. Infantry and cavalry stands within, but not towed guns, get +2 cover.
Aircraft
Aircraft are abstracted in the scenario.
On turn 1 or 2 - Axis players choice - Medjez is attacked by Stukas. The German player must select the arrival time before starting the game. At the end of the selected turn all stands within 12" of the three large BUA in Medjez get a -2 morale penalty
Special Rules
The game is 10 turns long. Turns 1-6 are daylight, 7-8 are night and 9-10 are daylight. Turns are roughly 100 minutes long during the day, longer at night
Max visibility at night is 4". Spotting distances are halved or 4" whichever is smaller. The following night rules are in effect (pg 93): 39.1.2 (2nd paragraph only); 39.1.4 and 39.1.7
Victory Conditions
The Allied player wins if there is at least one allied stand in good morale touching the bridge at Medjez at the end of turn 10. The Axis players win if there are no allied stands touching the bridge and 2 or less allied stands in good morale are to the east of line CF (the line excludes the road itself)
Good morale means not shaken and not demoralised
References
1st Derbyshire Yeomanry war diary WO175/293
1st Paratrooper Battalion War Diary: http://www.paradata.org.uk/media/309?mediaSection=War+Diaries&mediaItem=431
5 FJR: http://www.fjr-5.co.uk/history.php (Unfortunately this is a dead link)
Axis History Forum (Recce Regiments): http://forum.axishistory.com/viewtopic.php?t=140470
HS Militaria No. 25: http://www.39-45.org/viewtopic.php?f=23&t=5700&start=0
Les Chasseurs d'Afrique, Jacques Sicard and François Vauvillier. Relevant and translated excerpt: http://forum.axishistory.com/viewtopic.php?t=80544
Les Forces Francaises dans la Lutte Contre L`Axe en Afrique - La Campagne de Tunisie 1942-43: Marcel Spivak and Col. Armand Leoni. My thanks to Richard Baber for looking up the battle in his copy of the book. His blog with many interesting Tunisian themed entries: http://baberonwargames.blogspot.co.uk/
Medjez el Bab 1:25000 map: http://www.bl.uk/onlinegallery/onlineex/maps/africa/5001183u27u1u1943.html
Medjez el Bab 1:50000 map: http://www.bl.uk/onlinegallery/onlineex/maps/africa/4998570u27u1942.html
Northwest Africa: Seizing the Initiative in the West: http://www.ibiblio.org/hyperwar/USA/USA-MTO-NWA/USA-MTO-NWA-15.html
XXXI Guastatori: http://www.guastatori.it/?page_id=123