
Battle of Werba
29th June 1941
In late June the Soviet 8th Mechanised Corps lunched an attack northwards towards Dubno, aiming to cut through a deep penetration in their lines by the 11 and 16 Panzer Divisions
Initially the attack was fairly successful with the 34th Tank Division supported by the 24th Tank Regiment of the 12th Tank Division reaching the outskirts of Drubno on the 27th of June. The Germans had to scrape together a wide assortment of rear area troops too keep them out of the city.
On the 28th of June the first battle was fought at Werba on the 34th Division's flank. The Soviets launched an attack on the German panzers in the town. It was highly successful and the defenders broke an ran leaving several abandoned tanks behind them. (The identity of the unit that broke is unclear. it was most certainly part of 16 Panzer Divsion, it was likely the I/2 Panzer Regiment)
Werba controlled the vital road and rail links north to Dubno, ownership of the town pretty much cut off the supply route to the 34th tank Division to the north around Dubno. To make up for the previous day's debacle the 16 PD re-took Werba early on the 29th, and then regrouped to take the dominating heights above the town
Our scenario starts at this point with Kampfgruppe poised to assault up the hill. However the 34th Tank Division is keen to restore its supply route.
German Deployment
The majority of KG Sickenius starts on table, with the exception of I/2 Panzer Regiment. It is likely that II/64 Schützen Regt starts on foot. They may be deployed by the German player anywhere within the deployment zone delineated by the pink hashed line.
II/2 Panzer Regiment is a reinforcement. It may enter the table anywhere between points A & B. One company enters turn 5; one, plus the stab enters turn 8 and the last on turn 11. Randomise which company enters on which turn
Soviet Deployment
1st Battalion 23rd tank Regiment and 300th Motorised Rifle Regiment are deployed on the heights around point 261. A pink hashed line delineates their deployment zone. All personnel stands are dug in foxholes (-2 cover)
The immobile T-35 from 34th Tank Division must be placed on a road within 6" of Biatogrodka
The Staff of the 8th Mechanised Corps starts in or adjacent to any BUA in Biatogrodka
The Composite Tank Battalion is a reinforcement arriving turn 5, either down road X or between points Y and Z. Both routes may be used. It may be delayed by air attack (see below). There is no option to the Soviet player to leave these forces off the table or delay their arrival
Reinforcement Arrival
No reinforcement can arrive within12" and LOS of an un-demoralised enemy stand. If entry is impossible, the reinforcements can enter a turn later up to 12" from their indicated entry location. If entry is still impossible move 12" further away every turn until entry is possible.
Terrain
The map is 5ft x 10ft if playing at 1" = 50m. The black dotted line gives an alternate table 8ft x 5ft
The grey areas consist of 4"x4" BUA's. These for the most part or wooden so give -2 cover.
The tan lines are crest lines. Crest lines break LOS and give hull down positions to AFV's touching them (-2 cover). The thick lines around point 261 are higher than the surrounding terrain. Any stand within 3" of the line can see over all cover that usually breaks LOS unless the terrain feature is also within 3" of the line. They can also fire over friendly stands that are not within 3" of the thick lines.
The sandy coloured areas are steep slopes. All movement is halved within the area. The T-35 is not mobile enough to enter the area unless on a road.
The red lines are good roads, and they give a road bonus. The pink lines are little more than tracks and do not give a road bonus (ie they are little more than decoration)
The grey broken lines along some of the roads are walls. They give -2 cover to personnel stands only if the stand is adjacent to the wall . The walls break LOS, though stand adjacent to the wall can see and be seen. All stands on the road are considered adjacent to the wall. (in reality the walls are actually a line of houses along the road, but there are not enough to warrant a BUA. The walls are an attempt to simulate this.
The blue lines are streams. They have flat marshy banks and are impassable to vehicles. Infantry take a BMA to cross
The light blue areas are marshy meadows. They are for the most part impassable to vehicles though the T-34's may traverse them at quarter speed. Personnel may walk unimpeded. No manhandled guns.
The dark green areas are open woods
The light green areas are sparse woodland. They give no cover or concealment and do not impede movement. They count as open blocking terrain. They are not good enough cover to prevent air attack
The black dashed line is a railway. It has no game effect
Special Rules
The game starts at 14:00 and lasts 12 turns ending at dusk with the 21:00 turn
The green hashed line around Ptytscha is a "no go" area for the Germans until the turn after the Soviet reinforcements have arrived. No German stand may voluntarily enter the area. Forced back stands and stand that have retreated due to bad morale may enter the area but must move out as soon they are able. HQ units may enter to rally shaken or demoralised troops but must leave as soon as the job is done. All troops may enter if there are Russians in good morale within 12" of the border of the area. In no case may German troops be north of the river in the area indicated until the Soviet reinforcements are on table or until turn's 11-12.
If the Soviet reinforcements have not arrived, the Germans may enter the area freely on turn 11 & 12
The immobilised T-35 has broken down so may not move. If a hit on the tank indicated a force back result the crew will abandon the tanks and be forced back. They can re-crew the tank if given an order to move back to it. While the tank is without crew treat it as a de-crewed gun (ie any enemy stand touching it will destroy it)
The Fw-189 recce plane (see below) has a limited game effect. H&I fire from the German 105mm's gets a +2 bonus on targets within 12" of the plane (ie it comes down on a 1-5). The Fw-189 is considered above (and thus immune to) all Soviet AA fire.
The Composite Tank Battalion is considered to be moving to the table on turns 1-5+ (excepting the T-35) and is vulnerable to air attack. The infantry will be next to a tank. The German Ju-88 if rolled must attack one of the tanks in the column, German players choice. It will only get one tank. plus any adjacent infantry. Forcing back any tank delays the column by a turn. Any shaken result delays by two turns and demoralised by three turns. Assume a higher HQ is on hand. The T-35 is waiting in Ptytscha so is not subject to air attack in this way. The command tank is in the middle of the column. The command infantry is next to the BT.
The Ju-88 never bombs targets on table
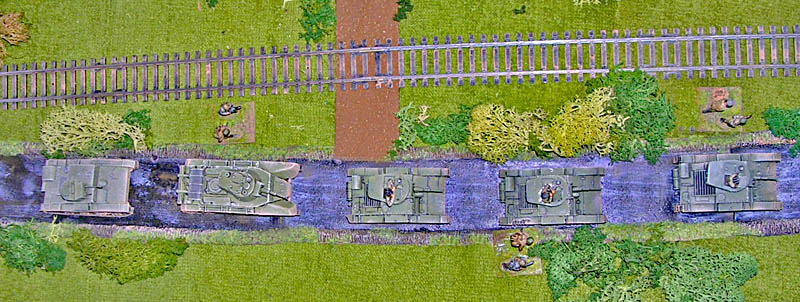
The following Luftwaffe recce photo can be used for targeting the Ju-88
Luftwaffe Air Support
Each turn roll d6, on a 4-6 the German get air support. On a 4-6 they get a Fw-189 recce plane unless the Soviets get a fighter that turn (see rules above). Also on a 6 they get a Ju-88 bomber (see rules for its deployment above). Finally on a 6 there is a 50% chance the Germans will get a Bf-109F fighter over the table.
VVS Air Support
Turns 1-5 & 11-12 the Soviets get air support on a 10 (d10). If rolled roll on the following table (d6): 1-4 Fighter, 5-6 Light Attack
Turn 6 the Soviets automatically get air support: a fighter, a pair of light attack and a bomber/attack
Turn 7-10 the Soviets get air support on a 6(d6). If rolled consult the following table (d6): 1-2 Light Attack. 3-4 Light Attack and Fighter, 5 Bomber/Attack; 6 Bomber/Attack & Fighter
Planes can be any suitable type eg: fighter: I-15, I-16 or LaGG-3. Light attack I-15, I-16 or LaGG-3 with rockets. Attack/Bomber: Il-2, Su-2, HB2 or Yak-2
Note fighters must be placed on board - they can not be "placed" to cover the Composite Tank Battalion off table
Victory Conditions
There are two objectives. The high ground around point 261 and the main road BX
If one side holds both objectives it is a decisive win. In one side holds an objective and the other is disputed it is a marginal win. Any other result is a possible draw, the tie breaker being the number of enemy tanks killed. The T-34, KV-1, PzKfw-III and PzKfw-IV count as two points; PzKfw-II, T-26, OT-26, BT-7 and T-35 count as one point
The high ground consists of the ridge line depicted by the thick line on the game map
To hold an objective a side must have stands in good morale touching it. They must have at least twice as many stands as the enemy or the objective is disputed
Good morale means NOT shaken and NOT demoralised
Historical Outcome
The Germans failed in their attack up the hill. The fire from the Soviet tanks was enough to compel the Germans to retreat towards Werba. However the counter attack by the Soviets out of Ptytscha was not strong enough to dislodge the Germans from Werba. the last Soviet tanks, including a T-35 succumbing to German fire on the outskirts.
Tactically the battle was a draw but the 34th Tank Division remained cut off to the North so operationally it was a German victory
References
The majority of the info for this scenario came from http://forum.panzer-archiv.de/viewtopic.php?t=4141 Alex's site: http://www.armchairgeneral.com/rkkaww2/ provides a good overall map of the attack by the 8th Mech Corps. The map I used is a 1930's Polish map of the area (see above) the original can be found here: http://www.mapywig.org/m/WIG100_300DPI/A47_B41_(XXX-19)_DUBNO_300dpi.jpg Jentz' Panzertruppen Vol1 provided the basis for the strengths of 16PD
The battle was somewhat confused and exact locations and strengths of subunits is often unclear with the references I have. However the scenario accurately depicts the broad outline of the action on the day