Battle of Voin
6th October 1941
(version 2.1)
Pictures of Game 1 Pictures of Game 2
This scenario was inspired by the Mtsnensk scenario that appeared in CPQ5. This is my take on events on the 6th of October. For the most part version two is based upon the account of the battle in T-34 The Legendary Weapon.
The First Guards Rifle Corps was a hastily formed unit thrown together in order to slow down the German's southern thrust on Moscow. Guderian's 24th Panzer Corps was attacking up the Orel to Mtsnensk road with little between it an the Soviet capital. Elements of the 1st Guards were thrown in the way of the Panzers in order to buy time for the Russians to build a coherent defence at Mtsnensk.
There were skirmishes between advancing German units, Soviet remnants and the lead elements of the 4th Tank Brigade on the 4th and 5th of October. The Russian's first real attempt to blunt the German onslaught was just south-west of the town of Voin on the Orel-Mtsensk road. At the core of the Russian defence were the new T-34 tanks of the 4th Tank Brigade, supported by NKVD troops. Facing them the Vorausabteilung (forward detachment) of the 4. Panzer Division. The push to Moscow was about to get a great deal tougher for the Germans
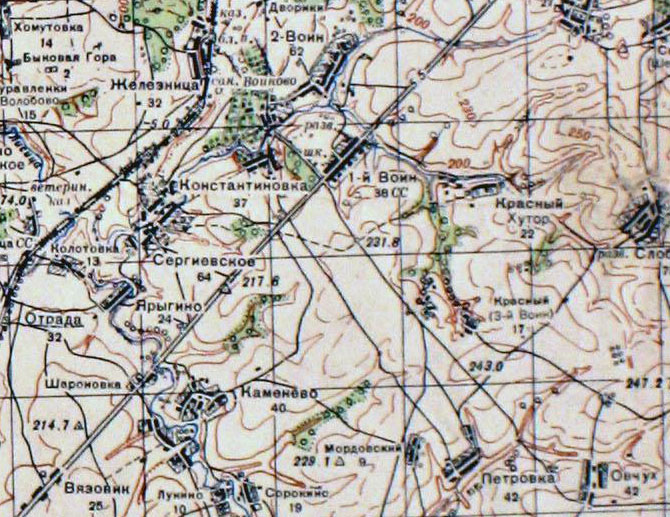
Voin on a Soviet wartime map. From http://www.wwii-photos-maps.com/
Order of Battle and Map.
Soviet Deployment
Most of the Soviet forces are deployed on map in the areas delineated by the pink dashed lines. All Soviet infantry and towed artillery units, that start on table, are dug in as are the two BT-7 tanks of 2nd Company 2nd Tank Battalion
The 4th Brigade HQ & HQ Company can be deployed as the Soviet player sees fit behind the Soviet front line
The Burya Detachment enters the table on turn 8 between points D&E. They may not enter within 12" & LOS of an un-demoralised German stand. If entry is impossible it is delayed until it is possible
The Guards Mortars are a Russian reinforcement. the FOs may be placed with the Katukov or any BHQ of any unit at the start of turn 10. The Katyushka have a maximum of two shots each
Other Soviet reinforcements enter anywhere between points A&B. They may not enter within 12" & LOS of an un-demoralised German stand. If entry is impossible it is delayed until it is possible. These reinforcements may be rolled for each turn starting turn 6. On the roll of a 5-6 (d6) the Soviet player may roll on the reinforcement table. If the unit has already been rolled there is no reinforcement this turn
Those units marked with a * have no command. They get a free move on to the table but before they can move again someone must take command of them.
All reinforcements lose a BMA on the turn they enter the table
German Forces
Most German forces are deployed on table in the areas delineated by the pink dashed lines. The Brigade Stab and 1 Batterie 11 FlaK Abteilung must be deployed touching the road
3 Batterie 65 Artillerie Regt is a reinforcement which enters down road F on turn 6. On turn 6, when it enters the table it loses a BMA
Terrain Notes
The table represents a 5ft x 6.5ft area if playing 1"=50m
The terrain is fairly open with good fields of fire. The terrain generally slopes from the east to the west, with the east corner of the map being the highest point on the table.
The brown dashed lines represent ridge lines. They break LOS an provide hull down positions for AFV's (except for units touching the dark brown ridge and the Nebelwerfer FO). The dark brown broken lines around point 235.3 are the highest point on the map. Units touching the dark brown line may see over all other ridge lines. They may not see over trees and BUA within 10", but can see over trees and towns further away. Units touching the dark brown line can fire over friendly stands over 10" from the ridge. There is a 3" "dead zone" behind trees, BUAs and friendly stands when spotting from the "high" ridge.
The red line up the centre of the map is the Orel to Mtsnensk. road, it is the only good road on the table. The pink lines are unmade dirt roads, they do not give road bonuses. There will be intermittent scrub along the road margins (2" "blobs" about 6-8" apart)
The green areas are open woods. Half speed for vehicles and man-handled guns no impediment for personnel.
The green dotted lines are tree lines, they break LOS, except for stands touching, and give light cover
The blue line is the Lisiza River and is un-crossable except at the bridge.
The grey squares are open BUA. These give -2 cover for personnel stands, however vehicles and towed guns within get no cover. There are no ROF restrictions. On the original map most of Seprenevskoe appears to be made up of long buildings, perhaps chicken sheds?
The sandy shaded area with the green border is a deep wide ravine, filled with scrub. The ravine takes 1 BMA to enter and 1 BMA to exit for personnel and (half) tracked vehicles. It is impassable for wheeled vehicles and manhandled guns When in the ravine a stand cannot be fired at (except from dark brown ridge, but not by NbW) except by another in the same ravine that can trace a LOS that never goes out of the ravine or a stand touching the ravine that can trace a LOS that never goes out of the ravine. Movement along the ravine is half speed for tracked vehicles and infantry, 1/4 speed for wheels and manhandled guns. Stands in the ravine get +1 cover. Max visibility along the ravine is 6". Stands in the ravine can not shoot out except against stands touching the ravine edge. Stands in the ravine do not block line of fire for stands outside the ravine..
The sandy shaded areas (with no border) are gullies. These provide medium (-2) cover to infantry and class I guns within. Personnel are unimpeded crossing. Tracked and half track vehicles take a BMA to cross. Manhandled guns and motorcycles take a BMA to enter the gully and a BMA to leave it.
Air Support
The Luftwaffe shot its bolt and bombed a bunch of Soviet dummy positions before the game starts. The VVS was active. The Soviet player may roll from turn 6 onwards. On a 7+ (d10) the Soviets get an I-16 or LaGG-3 light attack aircraft
Special Rules
The German attack starts at 11:00am, the game lasts 13 turns. At the end of turn 13 roll d10. On a 6+ there is a 14th turn
Before and after the battle the weather was inclement in the extreme but the day of the battle seems to have been reasonable clear.
The FO for the I Abteilung 53 Nebelwerfer Regiment is on a hill (point 213.7) about 500m off the German table edge. They have LOS as if on a dark brown "high" ridge (but not in to the ravine). They cannot see over ridge PQ on table. When measuring spotting measure from point F and add 10" to the on table range.
Guards Mortar FO's can only call fire if within 2" of Katukov or an Soviet BHQ
Victory Conditions
Victory is determined after the end of the last turn
The Germans win a major victory if they capture control the main road BF. This means that there should be no Soviet stands in good morale touching the road.
The Germans win a minor victory if they capture T-Junction X. This means that they must have more stands in good morale than the Soviets within 6" of the centre of the junction
The Russians win a minor victory if they prevent the Germans achieving their objectives.
The Russians win a major victory if they capture the Lisiza River Bridge at point F. The Soviets must have troops in good morale touching the bridge and the Germans may not. This condition trumps the German minor victory condition.
Good morale means not shaken and no demoralised
Historical Outcome
The 4th Tank Brigade gave the Germans a bloody nose. Although German casualties were probably less than the Russians claimed the Germans were shocked by the cleverly coordinated defence. This was one of the first times the Russians had managed to used their T-34 tanks en-mass. The German attack recoiled and Guderian spent two days stalled, licking his wounds, and re-supplying.
During the battle the Katukov the 4th Tank Brigade's commander made extensive use of dummy positions. These completely fooled the Germans absorbing the initial Stuka strikes and the preparatory artillery fires (these take place before the start of the scenario)